

Executive Overview
When executed with precision, applying concealer to dark circles is arguably the next best alternative to a restorative, eight-hour night of sleep. It possesses the transformative power to instantly awaken the face, diffuse shadows, and project a vibrant, well-rested aura. However, anyone who has ever dotted on the wrong shade, battled mid-day dryness, or watched their makeup cake and crack into fine lines by lunchtime knows that this cosmetic feat is often easier said than done.
Covering up dark undereye circles is fundamentally different from concealing a blemish or a rogue breakout. The undereye landscape presents a unique set of challenges: the skin is paper-thin, extraordinarily sensitive, prone to chronic discoloration, and subjected to the constant mechanical movement of facial expressions that invites creasing. Yet, once you decode the ideal shade, texture, and application technique, the results are nothing short of magical.
To demystify the process, we consulted a roster of the beauty industry’s most sought-after celebrity makeup artists and cosmetic chemists. From identifying undertones and customizing hydration levels to mastering the step-by-step application and knowing when to toss an expired tube, this comprehensive masterclass delivers everything you need to know for all-day performance.
Detailed Chronology & Step-by-Step Application Guide
Achieving a seamless, second-skin finish under the eyes is not about slapping on as much product as possible; rather, it is a deliberate, multi-step artistic routine. Top industry professionals break down the foolproof application chronology below.
Step 1: Prep and Prime the Skin
As with any masterwork, the canvas must be properly prepared. Always begin with clean, deeply moisturized skin. Because the undereye area lacks the oil glands found elsewhere on the face, it is more vulnerable to dehydration.
- The Eye Cream Phase: Celebrity makeup artists advise pressing in a lightweight eye cream and allowing it a few moments to fully absorb until the skin feels deeply hydrated but not slick or slippery.
- The Moisturizer and Primer Layer: Follow up with your standard facial moisturizer, ending with a gripping makeup primer if you require all-day wear. A grippy primer acts as an anchor, preventing your liquid formulas from migrating or slipping into micro-crevases as the hours tick by.
Step 2: Apply Strategic Amounts of Concealer
It is intensely tempting to slather the entire undereye zone in a thick blanket of heavy concealer, but beauty experts stress that more product does not equate to better coverage. In fact, excess product often draws unwanted attention to shadows and fine lines.
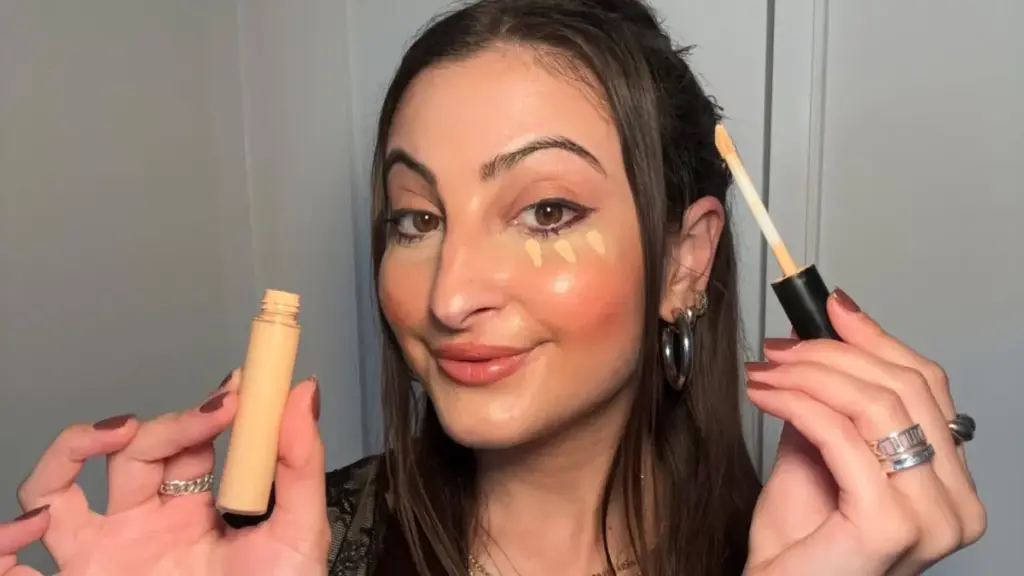
- The Three-Dot Rule: Start with just three tiny dots of concealer, beginning at the inner corner of the eye and following the natural crescent curve of your dark circles.
- The Philosophy of Less: “The goal is not to mask, but to bring the undereye back to its natural vibrancy with the least amount of product,” explains Sarah Tanno, global artistry director of Haus Labs.
- Build, Don’t Pack: NYC-based celebrity makeup artist Kasey Spickard echoes this sentiment. “Build your coverage—don’t pack a ton of concealer on and then try blending it out,” he warns. Heavy layers will inevitably shift and crease throughout a busy day.
Step 3: Lightly Blend for a Seamless Melt
The warmth of your hands can be a powerful tool when handling delicate skin, helping formulas melt seamlessly. You can tap and diffuse product with your ring finger, but for a truly airbrushed finish, professionals recommend utilizing specialized tools.
- The Precision Brush Technique: Tanno recommends a soft, tapered detail brush—such as the Haus Labs concealer brush or the Hourglass Vanish Seamless Finish Concealer Brush. “Its shape lets you sweep and tap the concealer exactly where you want it, almost as if you’re painting light onto the skin,” she notes.
- The Sponge Polish: As an expert finishing touch, take a damp mini makeup sponge and gently dab the area to smooth out every last crease. “This will also pick up any excess concealer, which is what can turn cakey as the day goes on,” notes celebrity makeup artist Nick Barose.
Step 4: Lock It In and Set
Setting your concealer with powder is not a mandatory rule; if you prefer a modern, dewy aesthetic, a fine mist of hydrating setting spray may be all you need. However, for longevity or mature skin types, powder must be handled strategically.
- The Mature Skin Approach: “If your undereyes are more mature, use the smallest amount of powder, and apply it with a fluffy brush so the finish stays soft and natural,” advises Tanno.
- The Pro Puff Method: If you prefer a long-wearing, dramatic set, you can use a powder puff, but never press a fully loaded triangle puff directly onto your skin. Instead, press the translucent powder into the back of your hand first, then tap the puff lightly onto the face. Finish with a setting spray to seal the look.
Supporting Context & Metrics: Choosing the Right Formula
Navigating the sprawling cosmetics aisle can feel overwhelming. To make informed purchasing decisions, you must align your skin type, undertone, and formula preferences with scientifically backed product categories.
Texture Matters: Pimple vs. Undereye Concealer
The heavy-duty, high-pigment matte concealer you rely on to obliterate active, angry breakouts is typically the worst choice for your undereyes.
- The Consistency Breakdown: “Undereye concealer should be less dry and thick in texture and consistency compared with pimple concealer,” says celebrity makeup artist Mai Quynh. Pimple formulas are engineered to dry down completely and lock into place on oilier regions of the face. Conversely, undereye skin is paper-thin and constantly moving; a stiff formula will immediately highlight dehydration and settle mercilessly into fine lines.
Matching Formula to Skin Type
Your intrinsic skin type dictates which chemical bases will serve you best:
- Dry Skin: Look for creamy, hydrating formulations infused with humectants like hyaluronic acid and glycerin. These draw moisture into the skin barrier, plumping the area throughout the day.
- Oily or Combination Skin: Prioritize natural-finish or serum-infused liquid concealers that offer breathable coverage without sliding off over sebum-rich zones.
The Science of Color Correction
If you are struggling with stubborn shadows, a standard skin-tone concealer may simply make the area look gray or ashy. You must address the underlying chromatic value of the darkness first.
- Blue/Purple Shadows: If your dark circles lean blue or purple (common in fair to medium skin tones), a peach or orange-toned color corrector acts as the direct chromatic complement, neutralizing the shadow and restoring warmth.
- Green/Sallow Casts: If your darkness features a greenish or olive cast, a rosy or pink-toned corrector lifts and freshens the area.
Once color-correcting is complete, you can layer a true skin-match concealer over top. For a subtle, lifted brightening effect, opt for a shade that is just a fraction lighter than your foundation.
Expert Perspectives & Specialized Techniques
Pro makeup artists deploy distinct methodologies depending on the unique conditions of the wearer’s face, whether dealing with beginner hurdles, seasonal allergies, or chronological aging.
For Beginners: Finding Your Footing
If you are new to makeup or perpetually dissatisfied with your current routine, experts suggest returning to foundational basics. Mai Quynh advises starting exclusively with liquid concealers.
- Forgiving Formulas: Liquids are far more forgiving, easier to sheer out, and ideal for building customized layers.
- The Golden Rule: Makeup artist Daniel Martin cautions against over-application: “Unless you’re a pro, dot the concealer where you want to provide the coverage, and tap with your ring finger until you’ve reached the coverage you want. It’s harder to remove concealer if you’ve applied too much.”
For Redness and Allergy Sufferers
Seasonal allergies or dry irritation can cause the undereye zone to flare up with red inflammation.
- The Green Neutralizer: To combat this, tap a tiny amount of green color corrector onto the redness before applying foundation.
- The Setting Mandate: “My trick is to always use an oil-absorbing setting powder after you apply your concealer,” notes Laura Geller, founder of Laura Geller Beauty. Because makeup around the eyes and nose breaks down quickly during allergy season, a targeted powder-set ensures your hard work doesn’t melt away by mid-afternoon.
For Mature Skin Types
As skin matures, it naturally loses collagen, elasticity, and lipid production. Los Angeles-based makeup artist Kelly Zhang notes that this structural evolution changes how makeup behaves.
- The Trap of Heavy Formulas: “That means thicker, high-coverage concealers tend to settle into fine lines and emphasize texture,” Zhang explains.
- The Solution: Avoid matte, dry pastes entirely. Instead, seek out serum-infused concealers rich in ceramides and peptides. Apply sparingly; as Zhang points out, “Concealer is heavier than foundation, so when it’s over-applied it looks cakey.”
Before or After Foundation?
The age-old debate of whether to apply concealer before or after foundation has no single correct answer.
- The "Before" Camp: Sarah Tanno prefers applying concealer first. This allows her to correct and brighten precisely, meaning she can use less product overall. She blends foundation only up to meet the concealer, keeping the undereye light and fresh.
- The "After" Camp: Kasey Spickard argues that laying down foundation first allows your base to do the heavy lifting for coverage, leaving concealer to act merely as a targeted booster. Ultimately, your routine should flex to match the textures and finishes of the products you prefer.
Future Outlook: The Product Lifespan Reality Check
Because we use such minuscule amounts of concealer at a single time, a single tube can easily linger in a makeup bag for years. While using expired makeup won’t necessarily cause catastrophic harm, it drastically compromises product performance.
Cosmetic chemist Jim Hammer warns of the chemical breakdown over time: “Over a long period of time, some concealers will start to break down and may darken or appear discolored, or even separated. Or the product may begin to dry up. It might not smell right or it might feel oily, or grainy, or have other issues.”
Furthermore, color shifts—such as a concealer taking on an orange hue—can signal microbial growth or ingredient oxidation.
- The Shelf-Life Rule: While many commercially packaged formulas are engineered to last two years unopened on a retail shelf, cosmetic chemists recommend discarding and replacing liquid eye products within six to nine months of opening.
By upgrading your product selection, honoring the philosophy of less-is-more, and adopting professional application chronologies, you can achieve a bright, crease-free, and effortlessly youthful undereye look every single day.