
Executive Overview
Respect where it’s due: concealer is arguably the most versatile multi-hyphenate MVP in any makeup bag. Capable of brightening hollow under-eyes, camouflaging stubborn blemishes, neutralizing stubborn redness, and even acting as a precision contour when chosen in a deeper hue, concealer is both a powerhouse and a precision tool. Yet, knowing how to apply concealer correctly is one of the most complex skills to master in cosmetics.
Unlike statement eyes, bold lips, or flushed cheeks—which are designed to stand out—a great concealer should disappear invisibly into the rest of your makeup base. Despite its low-key nature, an immaculate, long-lasting makeup look rests entirely on a seamless, well-executed base.
To demystify the art of complexion perfection, we tapped some of the industry’s top professional makeup artists. From foundational beginner tips to advanced color theory, tool selection, product layering, and shelf-life diagnostics, this comprehensive guide covers everything you need to know to take your concealer game to the next level.
Detailed Chronology & Step-by-Step Methodology
Mastering concealer requires moving past random dabbing and adopting a strategic, step-by-step methodology tailored to specific facial concerns. Top artists emphasize that different areas of the face require entirely different formulas, application techniques, and layering orders.
1. How to Apply Concealer for Beginners: The Basics
Even if you have been applying makeup for years, returning to basics can instantly upgrade your technique. Celebrity makeup artist Mai Quynh recommends starting with liquid formulas for everyday wear.
"Liquid concealers are more forgiving and easier to blend, and you can experiment with layering for the perfect amount of coverage," Quynh notes.
When layering, the golden rule is to start light and build upward. Celebrity makeup artist Daniel Martin warns against heavy-handed application:
"It’s harder to remove concealer if you’ve applied too much."
Excess product naturally migrates, creasing and collecting in fine lines. To avoid a cakey finish, Martin advises: "Unless you’re a pro, dot the product where you want to provide the coverage and tap with your ring finger until you’ve reached the coverage you want." The natural warmth of your finger helps melt the product into the skin for a skin-like finish. Once you build confidence, you can transition to precision brushes for exact product placement.
2. How to Cover Up Under-Eye Circles
The order of operations is everything when treating under-eye circles. For a smooth, airbrushed finish, renowned beauty expert Laura Geller recommends applying a lightweight liquid foundation first, followed by a brightening concealer in a shade slightly lighter than your skin tone.
"It provides a base to blend with the concealer for the perfect amount of coverage," Geller explains.
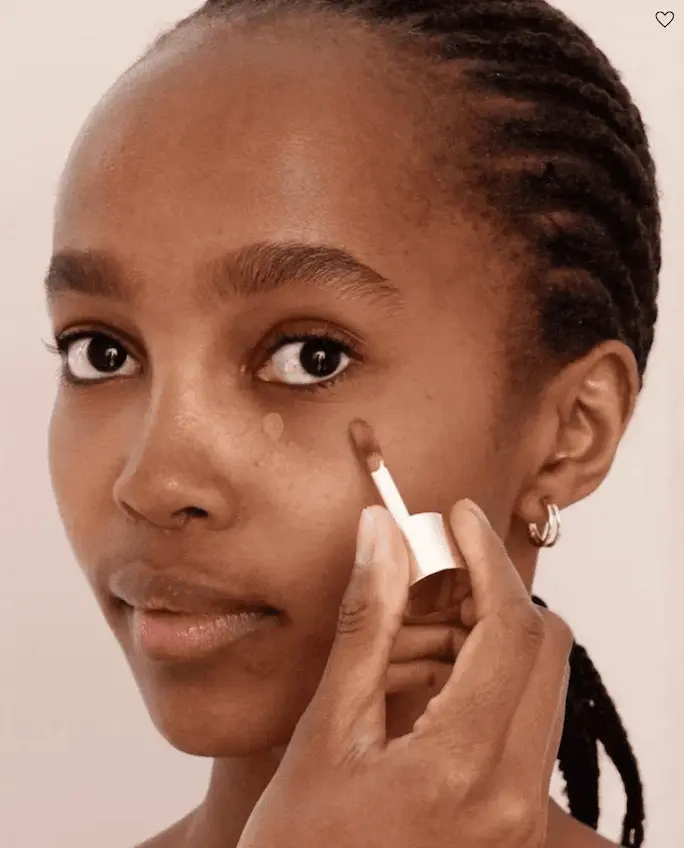
When applying under-eye concealer, use a gentle patting motion with a concealer brush or a damp makeup sponge. Never smear or drag. Dragging stretches the delicate skin and causes product caking. Furthermore, do not limit your concealer strictly to the center of the dark circle; ensure you dab a small amount into the inner corners of the eye to open up the gaze and achieve an instant, natural lift. Conversely, avoid dragging concealer past your smile line, as this will emphasize expression lines.
3. How to Conceal Redness and Handle Breakouts
Covering redness—whether from rosacea, broken capillaries, or seasonal allergies—requires long-wear tactics. Because makeup tends to wear off the nose and cheek areas quickly, Geller insists on using an oil-absorbing setting powder as a final locking step.
If standard concealer isn’t quite cutting it, turn to color theory. Green sits directly opposite red on the color wheel. Applying a lightweight green color corrector (such as the e.l.f. Camo Color Corrector or Maybelline New York Eraser Eye Colour Correcting Concealer) prior to foundation and concealer neutralizes redness at the root.
For stubborn breakouts, Urban Decay founder Wende Zomnir shares a foolproof pro-trick:
"I put Urban Decay Eyeshadow Primer Potion on blemishes before applying concealer. The primer restores the velvety texture to the blemished skin, so the concealer has something to stick to."
In this rare instance, the order shifts: Primer -> Concealer -> Foundation.
4. How to Hide Scars
Scars require a diagnostic approach before application. As Geller advises, first assess whether the scar is raised or flat.
- For raised scars: Opt for a creamy, lightweight formula like the Hourglass Vanish Airbrush Concealer to avoid emphasizing texture.
- For flat scars: Choose a thicker, full-coverage, matte formula such as the NARS Soft Matte Complete Concealer to lock in pigment, followed by a precise dusting of translucent setting powder.
Supporting Context & Metrics: The Pro Tool Kit
Choosing the right formula for the right job prevents common makeup pitfalls. Cosmetic chemists and makeup artists stress that a single tube of concealer cannot perform every task equally well.
Formula Breakdown: Spot vs. Under-Eye
- Under-Eye Concealers: Must be fluid, hydrating, and buildable. They should feature light-reflecting pigments and avoid heavy, dry waxes that settle into fine lines. Top contenders include the Charlotte Tilbury Beautiful Skin Radiant Concealer, Westman Atelier Vital Skincare Concealer, and Victoria Beckham x Augustinus Bader The Concealer Pen.
- Blemish & Spot Concealers: Require a stiffer, highly pigmented, matte consistency that grips to skin texture and stays locked in place all day, such as the Laura Mercier Secret Camouflage Complexion Perfector.
Sponges vs. Brushes: Which Should You Use?
- Damp Sponges: Ideal for large surface areas and under-eyes. A damp mini beauty sponge picks up excess product—the primary culprit behind midday cakeiness—while seamlessly smoothing out harsh edges (as championed by celebrity makeup artist Nick Barose).
- Precision Brushes: Essential for blemishes and dark spots. A stiff, tapered brush (like the Laura Mercier Secret Camouflage Brush) allows you to deposit pigment precisely into the center of a blemish and stipple outward, eliminating the dreaded "halo effect."
Official Statements & Expert Guidance
To maintain long-term skin health and flawless makeup application, industry leaders offer key preventative insights:
- On Prepping Dry Winter Skin: Always hydrate the under-eye and blemish zones prior to makeup application. Flaking skin will rapidly break down even the most expensive luxury concealers.
- On Setting Powder: While setting powder is essential for locking down redness and fresh blemishes, use it sparingly around the eyes. Heavy baking or excessive powder near the outer corners of the eyes accentuates fine lines. Opt instead for a finely milled, translucent brightening powder.
- On Color Correction: If dark circles feature strong blue or purple undertones that peek through standard concealer, makeup artist Katie Jane Hughes recommends deploying a peach-toned color corrector (such as the Charlotte Tilbury Magic Vanish or Bobbi Brown Skin Corrector Stick) to neutralize the darkness before adding base layers.
Future Outlook: The Lifecycle and Expiration of Complexion Products
One of the most overlooked aspects of makeup application is product expiration. Because concealer is often used in minute quantities, tubes and pots frequently linger in makeup bags for years, leading to degraded performance, patchiness, or skin irritation.
Cosmetic chemist Jim Hammer outlines the clear warning signs of expired concealer:
"Over a long period of time, some concealers will start to break down and may darken, appear discoloured, or separate. The product may begin to dry up, smell off, feel oily, or turn grainy."
Furthermore, if your concealer suddenly appears more orange or fails to match your skin tone, oxidation or microbial growth has likely occurred. While unopened concealers can remain stable on shelves for up to two years, Hammer advises consumers to retire and replace opened liquid and cream concealers every six to nine months to safeguard skin health and ensure optimal performance.
By investing in the correct formulas, tailoring your tools to your specific skin concerns, and adhering to professional sequencing, you can transform concealer from a frustrating guessing game into your most reliable beauty asset.