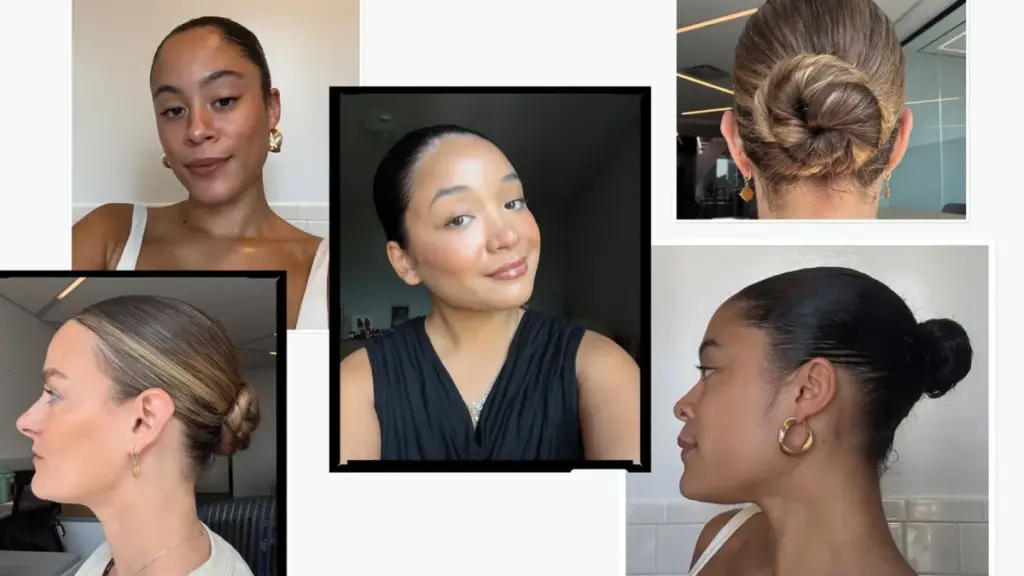
On paper, the slicked-back bun appears to be the epitome of effortless, model-off-duty elegance. In theory, achieving the look requires little more than gathering one’s hair toward the back of the head, twisting it into a tight knot, and securing it in place. In practice, however, stepping in front of the mirror thirty minutes past your scheduled departure time often reveals an entirely different reality: a landscape of mysterious scalp bumps, unruly cowlicks, and an endless army of stubborn flyaways refusing to cooperate.
The entire aesthetic of the style hinges on an illusion of immaculate precision—every single strand must look impossibly, intentionally placed. Consequently, executing this seemingly minimalist updo can quickly turn into a grueling test of patience, dexterity, and upper-body strength. Yet, industry professionals insist that a truly polished, glass-like slicked-back bun does not require the growth of a third arm, nor does it demand the aggressive, scalp-straining yanking that leaves many prone to tension headaches.
According to top hairstylists and beauty editors who wear the updo as a signature daily look, the secret lies in strategic preparation, tailored product selection, and a methodical, step-by-step assembly process. By understanding how to work with—rather than against—different hair textures, anyone can transition from a frustrating, uncooperative lump of hair to an editorial-grade, sophisticated silhouette.
Detailed Chronology: Step-by-Step Execution
Mastering the slicked-back bun requires breaking the styling routine down into distinct phases: preparation, sectioning and pulling back, adjustment, and final wrapping.
Phase 1: The Foundation and Prep Work
To achieve professional-grade results, you cannot simply launch straight into brushing your hair backward while dry. Prioritizing the prep process, and tailoring it specifically to your hair texture, ensures a smoother workflow with significantly less structural damage.
For Fine and Straight Hair: Hairstylist Chris Russell recommends beginning with a heat-protectant spray—such as the Bumble and Bumble Heat Shield Thermal Protection Hair Mist—to diffuse heat and defend against breakage. Following this, rough-dry the hair before running a thermal brush, like the Sutra IR Infrared Thermal Brush or Wavytalk Thermal Brush, through the strands.
Alternative Styling Tools:Allure content director Sophie Panych, who naturally possesses fine, straight hair, occasionally refines her texture using a flat iron. Meanwhile, social media manager Bianca Richards utilizes thermal brushes on her naturally thick, wavy hair to amplify sleekness prior to pulling it back.
For Curls and Coils: Commerce production assistant Hailey Roy, who has 3C curls, intentionally bypasses hot tools altogether, relying instead on natural-hair methodologies. When hair feels dry, celebrity stylist Kee Taylor advises working a lightweight oil—such as the Rãz Santa Lucia Heat Protectant Styling Hair Oil—through the mid-lengths and ends to boost shine and manageability without weighing the hair down. For curly and coily textures, legendary stylist Justine Marjan emphasizes keeping the hair slightly damp with water, which facilitates detangling and makes pulling the hair back with a wide-tooth comb much smoother.
Phase 2: Sectioning and Pulling Back
The single most common mistake people make when attempting a slicked-back bun is trying to brush all of their hair backward in a single, rushed pass. Professionals universally advocate for building the style systematically, section by section.
Establishing Sections: Hairstylist Mandee Tauber suggests creating a radial part running from the crown of your head straight down to the tops of your ears, dividing the hair into an upper and lower tier. Clip the top section away and style the bottom first. Roy notes that utilizing the pointed tail of a fine-toothed implement, such as the Donna Professional Parting Pin Tail Comb or Cécred Parting Tail Comb, makes dividing these sections clean and effortless.
Applying Tension and Hold: On straight or straightened hair, Tauber applies a pomade stick—such as the BondiBoost Strawberry Gum Grip Styling Stick—directly along the hairline for firm hold without flake accumulation. Next, she uses a boar bristle brush, like the Denman D81M Style & Shine Hair Brush or La Bonne Brosse N.01 The Universal Brush, to condense and refine the hair using long, sweeping strokes. "Boar bristles create the tension needed to stretch and smooth the strands," Taylor explains.
Adapting for Textured Hair: When styling curly and coily hair, Taylor advises working in even smaller, micro-sections, smoothing each one individually before gathering the entire mass together. Instead of a solid pomade stick, Tauber recommends working a generous amount of Oribe Gel Sérum around the hairline, followed by a boar bristle brush. If extra reinforcement is required, Marjan suggests misting the roots with a formula like the Paul Mitchell Firm Hold Super Clean Extra Hairspray before securing the first pony with an elastic.
Phase 3: Structural Adjustments and Detailing
Before twisting the secured ponytail into a bun, preparation for structural volume and surface gloss is paramount.
Injecting Volume: Hairstylist Taylor Carter recommends dusting a texturizing powder—such as IGK Beach Club Texture Powder—through the ponytail. This adds internal friction and grip, preventing the final bun from looking flat, while remaining completely invisible. She then teases small interior sections individually before smoothing the exterior layer with Color Wow Pop & Lock Serum or E.L.F. Gloss Mode Treatment Oil.
Refining the Hairline: Tauber stresses that detailing the hairline is what elevates a good bun into a great one. Using a flat iron (such as the Tymo Flaight Holo) paired with a toothbrush-style detailing brush (like the DAE Dual-Edge Styling Brush), stylists eliminate stubborn frizz along the perimeter without aggressive tugging.
Phase 4: Wrapping and Securing the Bun
While every expert twists the ponytail before shaping the bun, the exact technique varies based on hair density and desired aesthetic.
The Single-Rope TUCK: Tauber twists the entire ponytail into a single, cohesive rope, wraps it tightly around the base, and tucks the ends underneath. For straight hair, she secures this with a large U-pin, weaving it through the outer edge, deep into the base, and back out for hidden structural support. For coils, she bypasses pins, opting instead for a secure elastic wrapper.
The Ballet-Inspired Split: Panych draws on her background in competitive dance to execute a flatter, more streamlined bun. Rather than leaving the ponytail whole, she splits a single ponytail into two distinct halves. "In ballet, you don’t want this big, knob-like donut thing on your head," she explains. She twists and wraps the first half around the base for a full loop, then unclips and twists the second half into the first, pinning continuously with U-pins. This dual-pinning strategy offers superior, long-lasting security.
The Modern Tail: For a contemporary edge, Russell intentionally leaves the final inch or two of the ponytail exposed after forming the bun, injecting an element of casual modernity.
Supporting Context & Metrics: The Science of Hair Health
While achieving an immaculate, mirror-like sheen often requires heavy-duty styling agents, experts stress that product-heavy routines can still prioritize long-term hair health.
The Mechanics of Tension: According to Kee Taylor, relying excessively on sheer muscle power to pull hair back tightly is a recipe for scalp fatigue and traction alopecia. "The key is to let the brush and styling product do most of the work rather than pulling excessively tight," she notes.
Strategic Placement and Facial Sculpting: Russell highlights that positioning the ponytail high at the crown—with the hair running parallel to the cheekbones—creates an instant, natural lifting effect. This high-placement geometry mimics the visual benefits of cosmetic procedures, offering a visibly sculpted, "snatched" facial appearance, though low-slung variations remain equally viable depending on personal taste.
Finishing Innovations: The final phase relies on targeted finishing agents. Taylor applies Cécred Restoring Hair & Edge Drops to impart glossy sheen without stiffness, while Carter utilizes Davines This Is a Dry Wax Finishing Spray to lock the updo while retaining tactile softness. For extreme hold, Richards turns to Rizos Curls Sleek Styling Cream + Taming Wand, and Roy locks down her base using Got2B Glued Styling Spiking Glue.
Official Statements & Expert Perspectives
The collective consensus among top editorial stylists points to a single fundamental truth: perfection in hair styling is a byproduct of architecture rather than brute force.
"Detailing the hairline is what takes a sleek bun from good to great. You have to let the products and the right tools—like boar bristle brushes and micro-detailing wands—do the heavy lifting so your scalp doesn’t have to suffer through unnecessary tension."
— Mandee Tauber, Celebrity Hairstylist
"In ballet, you don’t want this big, knob-like donut thing on your head. Separating the ponytail helps it lie flatter against the skull, and utilizing both internal and external pins guarantees the style won’t budge through a rigorous day."
— Sophie Panych, Content Director at Allure
Future Outlook: The Evolution of the Low-Maintenance Updo
As beauty trends continue to favor a hybrid of high-fashion polish and accessible daily routines, the slicked-back bun has firmly cemented its status as a permanent fixture in modern grooming. Moving forward, the conversation within the professional styling community is shifting away from damaging, ultra-taut styling habits toward health-conscious execution. Innovations in flexible, non-flaking styling sticks, multi-use hair oils, and thermal grooming implements indicate that consumers are demanding styles that look immaculate on a video call or red carpet while preserving hair integrity beneath the surface.
Ultimately, mastering this look requires a shift in mindset: view the routine not as a rushed morning chore, but as an intentional architectural exercise. With patience, the right product arsenal, and an understanding of your unique hair texture, achieving an expert-grade sleek bun transforms from an elusive mirror-side struggle into a seamless, confident daily ritual.