
Executive Overview
When applied correctly, concealer for dark circles is widely regarded as the next best cosmetic alternative to an uninterrupted eight-hour night of sleep. Yet, if you have ever dotted on the wrong shade, or experienced the frustration of dry, cakey cracking beneath your eyes by midday, you already know that achieving a flawless finish is often easier said than done.
Covering up dark circles is rarely as straightforward as masking a sudden blemish. The undereye landscape presents unique challenges: skin that is exceptionally thin and sensitive, persistent deep-seated discoloration, and the constant, lingering threat of creasing. However, once you isolate the ideal formulation, color family, and application technique, the results can be entirely transformative.
To demystify this daily beauty ritual, we turned to top-tier professional makeup artists and cosmetic chemists. From decoding undertones and managing skin types to setting your cover-up for all-day performance, this comprehensive guide covers everything you need to master the art of undereye concealment.
Detailed Chronology: The Evolution of Undereye Concealment Techniques
For decades, the standard makeup routine dictated a rigid order of operations: heavy foundation all over the face, followed by a thick layer of bright concealer plastered underneath the eyes. Over time, however, professional artistry has evolved dramatically, shifting away from heavy masks toward lightweight, targeted correction.
Phase 1: Heavy Pastes and the "Cakey" Era (Early 2000s and Prior)
Historically, concealers were designed with heavy waxes and thick, opaque pigments meant to cover everything from tattoos to surgical scars. While effective at completely blocking out pigment, these dense formulations wreaked havoc on the delicate undereye area. They settled stubbornly into fine lines, emphasized crepey textures, and oxidized throughout the day, turning orange or grey under natural light.
Phase 2: The Baking Phenomenon and Heavy Baking Powders (2010s)
The advent of social media beauty tutorials introduced the concept of "baking"—packing massive amounts of translucent powder over a thick layer of liquid concealer and letting it sit for minutes before dusting it off. While this created a hyper-matte, airbrushed look suited for high-definition cameras and photography lighting, it proved largely unsustainable for everyday wear, often leaving dry skin looking parched and accentuating signs of aging.
Phase 3: Serum-Infused, Skin-First Hybrid Correction (Present Day)
Today, the industry has embraced a "skin-first" philosophy. Modern concealers double as skincare, infused with active ingredients like hyaluronic acid, caffeine, niacinamide, and peptides. The prevailing methodology focuses on color correction, ultra-thin fluid layering, and strategic placement rather than total obliteration. The goal is no longer to hide the skin entirely, but to restore natural vibrancy while preserving the skin’s organic texture.
Supporting Context & Metrics: Choosing the Right Formula and Shade
Finding the right concealer requires evaluating more than just your skin tone. Professional makeup artists emphasize that your skin type, the specific undertone of your darkness, and the product’s formulation must align to achieve a seamless look.
Formula Matters: Pimple Concealer vs. Undereye Concealer
The heavy-duty, matte concealer that expertly camouflages your angriest breakouts is rarely the right choice for the fragile skin beneath your eyes.
"Undereye concealer should be less dry and thick in texture and consistency compared with pimple concealer," explains celebrity makeup artist Mai Quynh. "You want to make sure your pimple concealer stays put, while your undereye skin is delicate and thinner, and you want a concealer that won’t settle into fine lines."
Tailoring to Your Skin Type
- Dry Skin: NYC-based celebrity makeup artist Kasey Spickard recommends creamy, hydrating formulas enriched with humectants like hyaluronic acid and glycerin. These ingredients draw moisture into the skin and prevent the formula from cracking.
- Oily or Combination Skin: Spickard advises opting for a natural-finish or satin liquid concealer that balances moisture without slipping away as sebum production increases throughout the day.
Decoding the Color Wheel: How to Correct Discoloration
Addressing dark circles effectively requires neutralizing the underlying tone of the shadow before applying a skin-matching shade.
- Blue or Purple Undertones: If your dark circles lean cool (often caused by thin skin revealing underlying blood vessels), Sarah Tanno, global artistry director for Haus Labs, recommends a peach tone. "A peach tone works beautifully to bring that warmth back and soften the shadow."
- Green or Sallow Casts: If your darkness carries an olive or yellowish-green tint, a rosy or pink-toned corrector provides a gentle lift and adds instant freshness.
Once color-corrected, layer a concealer matching your true skin tone for seamless integration. For an added brightening effect, select a shade that is only slightly lighter than your foundation specifically for the inner corners of your eyes.
Step-by-Step Application Guide, According to Pro Artists
Achieving a professional-level finish requires a methodical approach. Follow these four essential steps to ensure all-day wear without creasing or caking.
Step 1: Prep the Skin
Never apply makeup to a blank, dry canvas. Start with clean, thoroughly moisturized skin. Because the undereye area lacks oil glands and is exceptionally thin, it demands extra care.
- Gently press in a lightweight eye cream and allow it to absorb until the skin feels hydrated but not slippery.
- Layer a lightweight moisturizer and a gripping makeup primer to lock everything in place.
Step 2: Apply Sparingly
It is tempting to swipe a massive triangle of concealer across the entire undereye zone, but more product rarely translates to better coverage. In fact, excess product draws unwanted attention to fine lines.
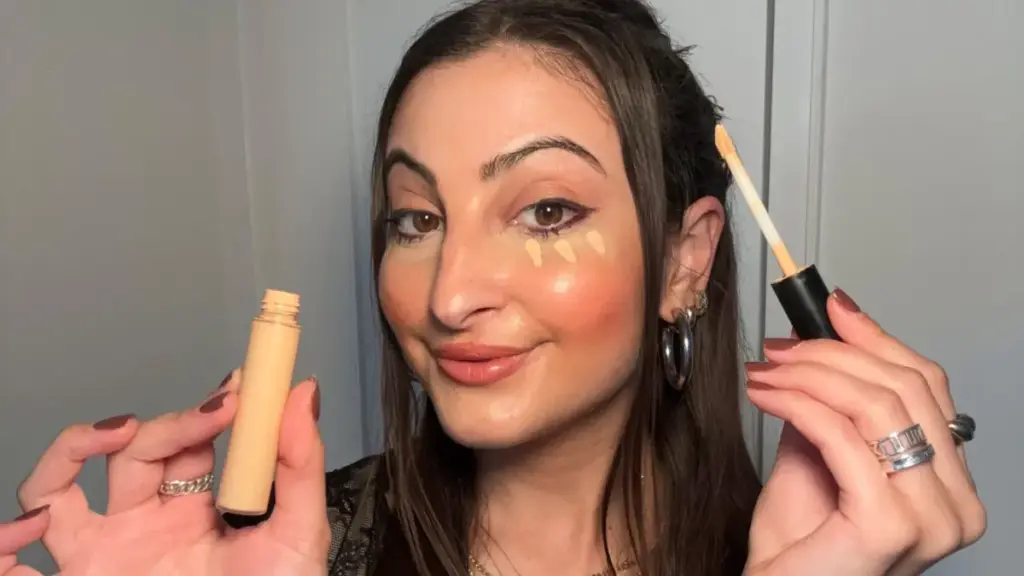
- Start with three tiny dots of product: one at the inner corner, one under the center of the pupil, and one tracking upward at the outer corner.
- "The goal is not to mask, but to bring the undereye back to its natural vibrancy with the least amount of product," Tanno advises. Build your coverage gradually rather than packing on product all at once.
Step 3: Lightly Blend with Precision Tools
While the warmth of your ring finger can help melt cream formulas into the skin, professional tools offer superior control.
- Tanno recommends a soft, tapered detail brush—such as the Haus Labs concealer brush—which acts like a paintbrush, allowing you to deposit pigment precisely where light needs to be restored.
- For a final smoothing touch, use a dampened mini makeup sponge to tap over the area. "This will also pick up any excess concealer, which is what can turn cakey as the day goes on," notes celebrity makeup artist Nick Barose.
Step 4: Set with Intention
Setting your concealer with powder is optional; those who prefer a dewy finish can rely on a hydrating setting spray. However, if longevity is your priority, technique matters.
- For Mature Skin: Use the absolute minimum amount of translucent, brightening powder applied with a fluffy, soft brush to maintain flexibility.
- The Pro Powder Technique: Never press a fully loaded powder puff directly onto your undereyes. Instead, tap the puff against the back of your hand first to distribute the powder evenly, then press it lightly onto the skin. Lock it all in with a final mist of setting spray.
Foundation Timing: Before or After Concealer?
One of the most fiercely debated topics in everyday beauty routines is whether to apply undereye concealer before or after foundation. According to the experts, there is no single right answer—it depends entirely on the look you want to achieve.
The Case for Concealer First
For a lightweight, natural everyday appearance, Sarah Tanno prefers starting with concealer.
"I like to start with undereye concealer because it lets me correct and brighten first, then build the rest of the complexion around it," she explains. "I never take foundation directly over the undereye. I simply blend the foundation up to meet the concealer so the two melt together."
The Case for Foundation First
Conversely, Kasey Spickard argues that applying foundation first maximizes coverage.
"My logic here is, your foundation is going to do a lot of work in getting you coverage and then you can go in and boost it with concealer," he notes.
Ultimately, your routine should adapt to the specific textures and finishes of the products you choose to use.
Special Considerations: Beginners, Redness, and Mature Skin
For Beginners
If you are new to makeup or struggling with your current routine, simplicity is key. Celebrity makeup artist Mai Quynh advises starting with a liquid concealer.
"Liquid concealers are more forgiving and easier to blend, and you can experiment with layering for the perfect amount of coverage."
Makeup artist Daniel Martin suggests starting with minute dots, tapped out using your ring finger, to avoid the pitfall of applying too much product.
For Undereye Redness
Allergies and irritation can cause redness around the eyes. To counteract this, apply a green color corrector before your foundation and skin-tone concealer. Finish with an oil-absorbing setting powder, as makeup tends to break down faster around the eye and nose area during allergy season.
For Mature Skin
As skin ages, it naturally loses collagen and moisture, causing the undereye area to become more textured.
"Thicker, high-coverage concealers tend to settle into fine lines and emphasize texture," warns Los Angeles-based makeup artist Kelly Zhang.
Mature skin thrives on hydrating, serum-based formulas containing hyaluronic acid or ceramides, applied with a light hand to avoid a cakey appearance.
Cosmetic Shelf Life: Does Concealer Expire?
Because we use such small amounts of concealer per application, a single tube can easily linger in a makeup bag for years. However, expired makeup loses its efficacy and can harbor bacteria.
According to cosmetic chemist Jim Hammer:
"Over a long period of time, some concealers will start to break down and may darken or appear discolored, or even separated. Changes in color are often indicative of problems in the product—like microbial growth or oxidation—so that’s a good indicator that it’s time to buy a new tube."
While most unopened cosmetics are formulated to last two years on a shelf, experts recommend discarding and replacing open liquid concealers within six to nine months of first use.
Future Outlook: The Next Wave of Complexion Innovation
As beauty technology advances, the boundary between skincare and cosmetics continues to blur. The next generation of undereye products is moving toward bio-compatible serums, cold-press botanical infusions, and adaptive pigments that adjust dynamically to skin micro-climates throughout the day.
Furthermore, advancements in micro-milled mineral powders and breathable polymers promise even greater longevity without sacrificing flexibility. As the industry shifts further away from heavy, hyper-corrected aesthetics toward hyper-realistic, skin-enhancing finishes, mastering the foundational techniques of color theory and light application will remain the ultimate key to a flawless, refreshed look.